Why Most Beginners Fail to Start a Fire — and What to Do Instead
Most people fail at their first fire attempt for one simple reason: they skip the preparation. A fire doesn’t start from a spark alone. It starts from a system — tinder, kindling, and fuel working together in the right order. Get that sequence right, and fire becomes predictable.
Before you touch a single match, gather three types of material:
- Tinder — dry, fine material that catches a spark instantly (dry grass, shredded bark, cotton balls, dryer lint)
- Kindling — small sticks, roughly pencil-thick, that bridge the gap between tinder and logs
- Fuel — larger logs that sustain the fire once it’s going
Think of it like starting a car engine in winter. You don’t floor the gas pedal immediately — you warm it up gradually. Tinder is the ignition, kindling is the warm-up, fuel is the open road.
What Fire Actually Needs: The Fire Triangle
Fire requires three things simultaneously: heat, oxygen, and fuel. Remove any one of them and the fire dies. This isn’t abstract chemistry — it’s your practical checklist every single time.
That’s why you never smother a young fire with a big log. The log cuts off oxygen before the heat is strong enough to compensate. Start small. Build up.
How to Build Your Fire Lay
The structure you arrange your materials in is called a fire lay. Two setups work best for beginners.
- Teepee lay: Place tinder in the center. Lean kindling sticks around it like a tent. Add slightly larger sticks on the outside. Light the tinder at the base. Heat rises through the center and ignites each layer. This lay produces a hot, focused flame quickly — ideal when you need fire fast.
- Log cabin lay: Place two larger sticks parallel on the ground. Stack two more perpendicular on top, like a square frame. Build upward, decreasing stick size as you go. Place tinder and kindling in the center. This burns longer and more evenly — better for cooking or sustained warmth.
Choosing the teepee lay means faster ignition but a shorter burn. The log cabin gives you longevity, but takes longer to catch. Pick based on what you actually need.
Using a Knife for Chipping: What It Means and How to Do It Safely
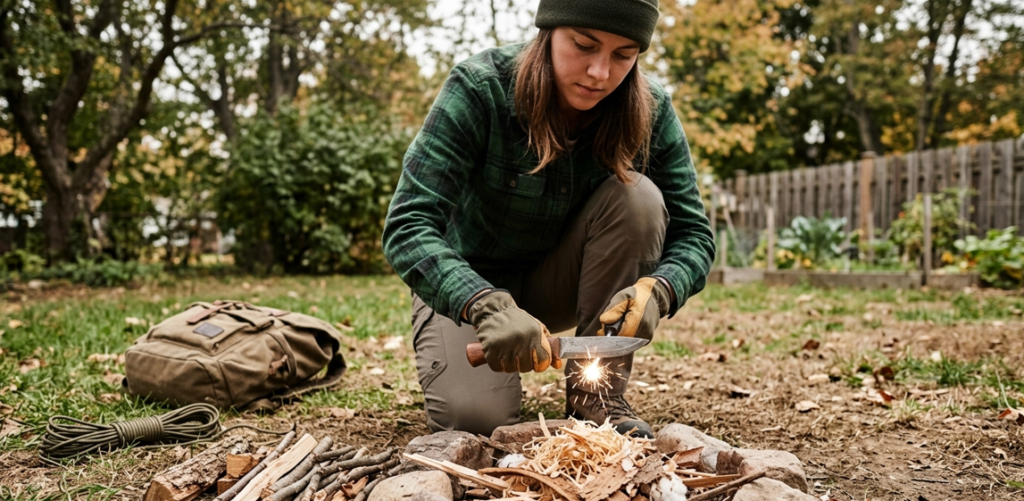
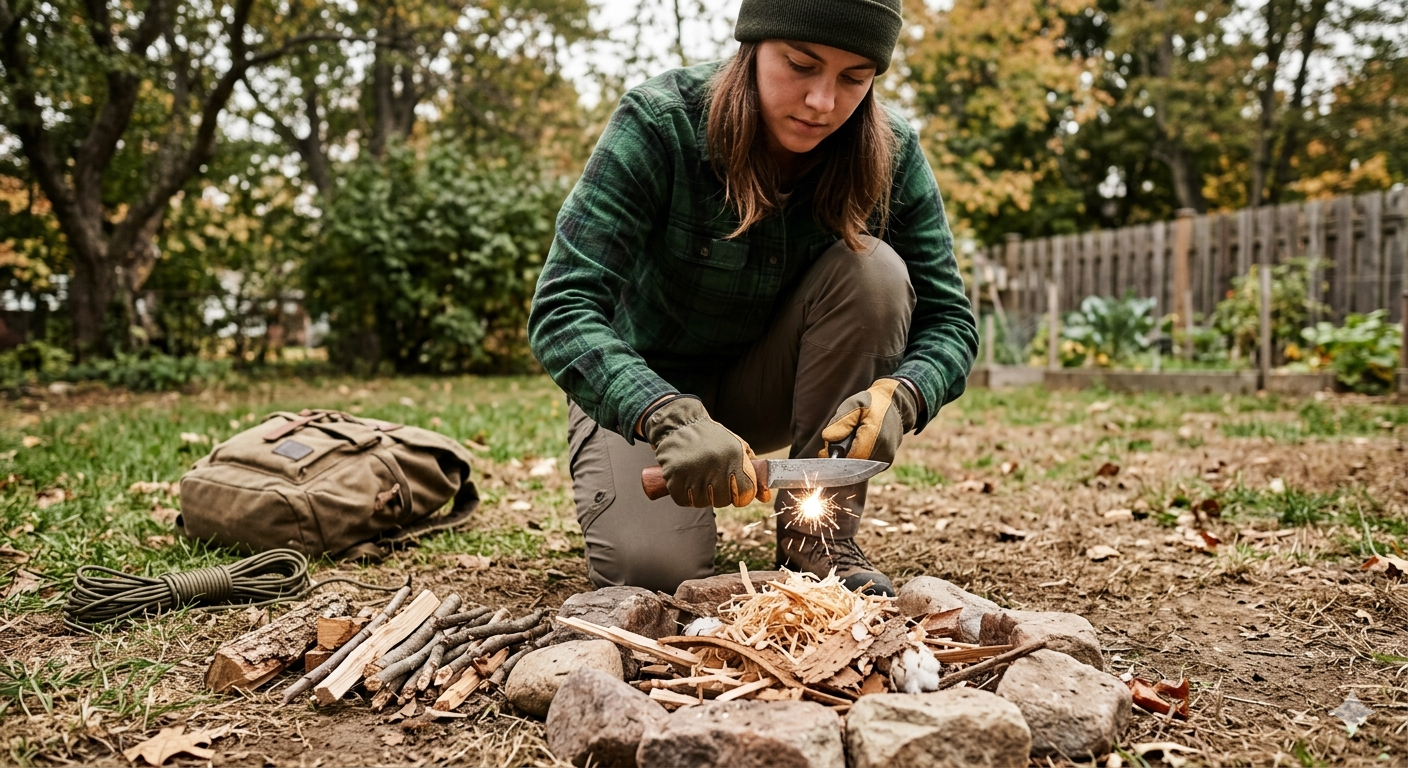
One technique beginners often overlook is using a knife to prepare materials — specifically, to chip or scrape wood into fine shavings for tinder, or to strike a ferrocerium rod and produce sparks.
A ferrocerium rod (commonly called a “ferro rod”) is a metal stick that throws hot sparks — around 3,000°F — when scraped with a hard edge. Your knife spine works perfectly for this.
Here’s how to do it safely:
- Hold the ferro rod firmly with your non-dominant hand, pointing it toward your tinder bundle at a low angle.
- Place the spine (the flat, unsharpened back edge) of your knife against the rod.
- Push the rod backward toward you while keeping the knife stationary — this controls the direction of sparks and keeps your hand away from the tinder.
- Sparks land in the tinder. Gently blow until you see a glow, then a flame.
Never drag the blade edge across the rod — you’ll dull your knife and lose control of the motion. The spine does the work.
“New students always want to strike fast and hard. Slow down. One controlled stroke that sends sparks directly into the tinder is worth ten wild swipes that scatter them everywhere. Accuracy beats force every time.”
Fire-Starting Methods Compared
| Method | Skill Level | Equipment Needed | Works in Wind? | Best For |
| Matches | Beginner | Matches, dry tinder | Poorly | Quick backyard fires |
| Lighter | Beginner | Lighter | Moderately | Everyday reliability |
| Ferro Rod + Knife | Beginner–Intermediate | Ferro rod, knife | Yes (with practice) | Building real skill |
| Bow Drill (friction) | Advanced | Carved wood kit | Yes | No-gear emergencies |
The ferro rod sits in the sweet spot for skill-building. It’s affordable (under $15 for a quality rod), works when wet, and lasts for thousands of strikes. A lighter is faster, but choosing the lighter every time means you never develop the skill. The main trade-off with the ferro rod: it demands practice. Plan on 15–20 attempts before it feels natural.
What Happens When It Doesn’t Work: A Real Scenario
Picture this: a father in suburban Ohio tries to teach his 10-year-old daughter fire starting on a Saturday afternoon. They have dry wood, a ferro rod, and good intentions. After 20 failed attempts, frustration sets in.
The problem wasn’t the technique. It was the tinder. They used torn cardboard — too dense, not enough surface area. They switched to a cotton ball pulled apart into a loose, airy nest. On the third strike, it caught. The daughter held the burning bundle, transferred it to the kindling structure, and had a fire going in under two minutes.
The surface area is everything with tinder. The more fibers exposed to the spark, the faster ignition happens. Compact material resists catching. Fluffy, loose material invites it.
“I tell every beginner: your tinder bundle should look like a bird’s nest — loose, layered, and with a small depression in the center where the spark lands. If it looks like a ball of paper, pull it apart again.”
The “Under the Hood” of Fire Starting
Three facts most guides skip entirely:
- Dry wood isn’t just about feel — wood with more than 20% moisture content won’t sustain combustion reliably. A simple moisture meter (under $20 at any hardware store) removes all guesswork.
- Hardwoods like oak and hickory burn hotter and longer than softwoods like pine. Pine ignites faster but burns out quickly — useful for kindling, not fuel.
- Wind is your enemy at ignition and your friend once the fire is established. Shield your tinder bundle during lighting, then let airflow feed the growing flame.
How Do You Know Your Fire Is Ready to Leave Unattended?
You don’t leave it unattended — not until it’s fully extinguished. This is non-negotiable.
To put out a backyard fire safely:
- Stop adding fuel at least 20 minutes before you plan to finish
- Pour water slowly over all embers, not just the visible flames
- Stir the ash with a stick and pour again
- Hold your hand 6 inches above the pit — if you feel any heat, it’s not out
The U.S. Fire Administration reports that outdoor fires cause over 5,000 structure fires annually in the United States. Most start from improperly extinguished embers. Cold ash is the only safe ash. [Source: U.S. Fire Administration, usfa.fema.gov]
Your First Practice Session: Keep It Simple
Start with a lighter and a teepee lay. Get comfortable with the structure and the sequence. Once you’ve done that three or four times successfully, switch to a ferro rod. Focus on tinder quality before worrying about technique.
According to the American Red Cross, basic fire-starting is one of the top five skills recommended for household emergency preparedness. [Source: redcross.org] You don’t need to be an expert. You need to be practiced enough that it works when it matters.
Start in your backyard. Start this weekend. The skill builds faster than you think.